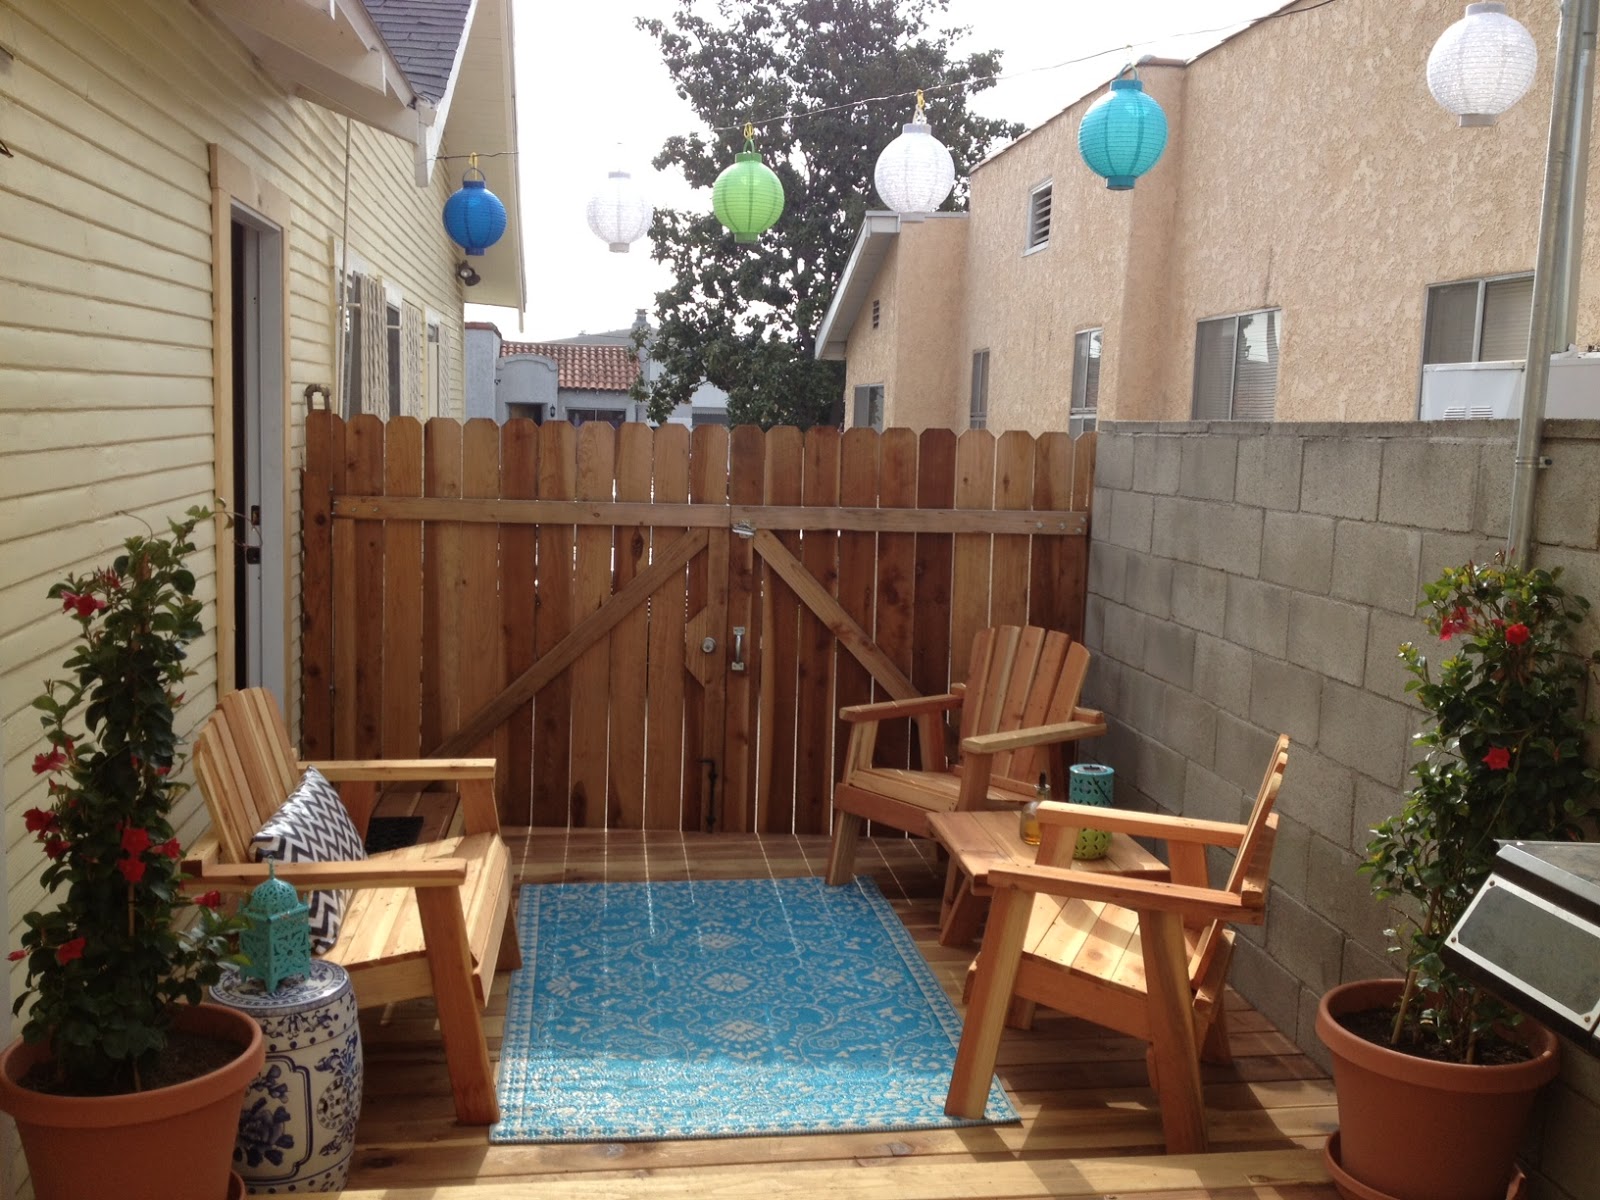
We've all seen the increasingly popular pallet crafts that dominate Pinterest. And if you're like me, you admire them but think, "where am I supposed to find all these pallets??" Well, after getting six tons of stone delivered for my backyard patio, I suddenly found myself with an embarrassing excess of pallets and an itch to create something - anything - out of them.
Enter Chris Baughman, my crafty partner in crime. Together we brainstormed ideas - a coffee table! A work bench! Book shelves! Eh, let's just get started and see what happens!
We began by painstakingly removing the boards from the top and bottom of the pallets. I'm gonna be honest here, that part sucked. The wood was so dry and old that it split very easily, and removing the rusty nails was no easy feat. I began to realize why most of the pallet crafts I found online involved simply repainting pallets and adding feet or cushions. Those people are smarter than we are!
Once it was clear that we weren't going to get long lengths of useable wood, Chris and I decided to scale down our project to something a little more manageable. I had been toying with the idea of making some attractive DVD storage boxes for my new built ins (!), and this was the perfect opportunity!
I began by cutting the split ends off the planks of wood, and then cutting the useable pieces down to 18.5" long. 5 pieces total made up the two front pieces, two bottom pieces, and one back piece. I want the back to be shorter so that it will reveal the DVD spines. My handy helper, Chris, sanded the heck out of the splintery boards.
I then cut some little blocks out of some scrap wood and nailed the front and bottom planks to them at the joints. This will help make the box sturdy.
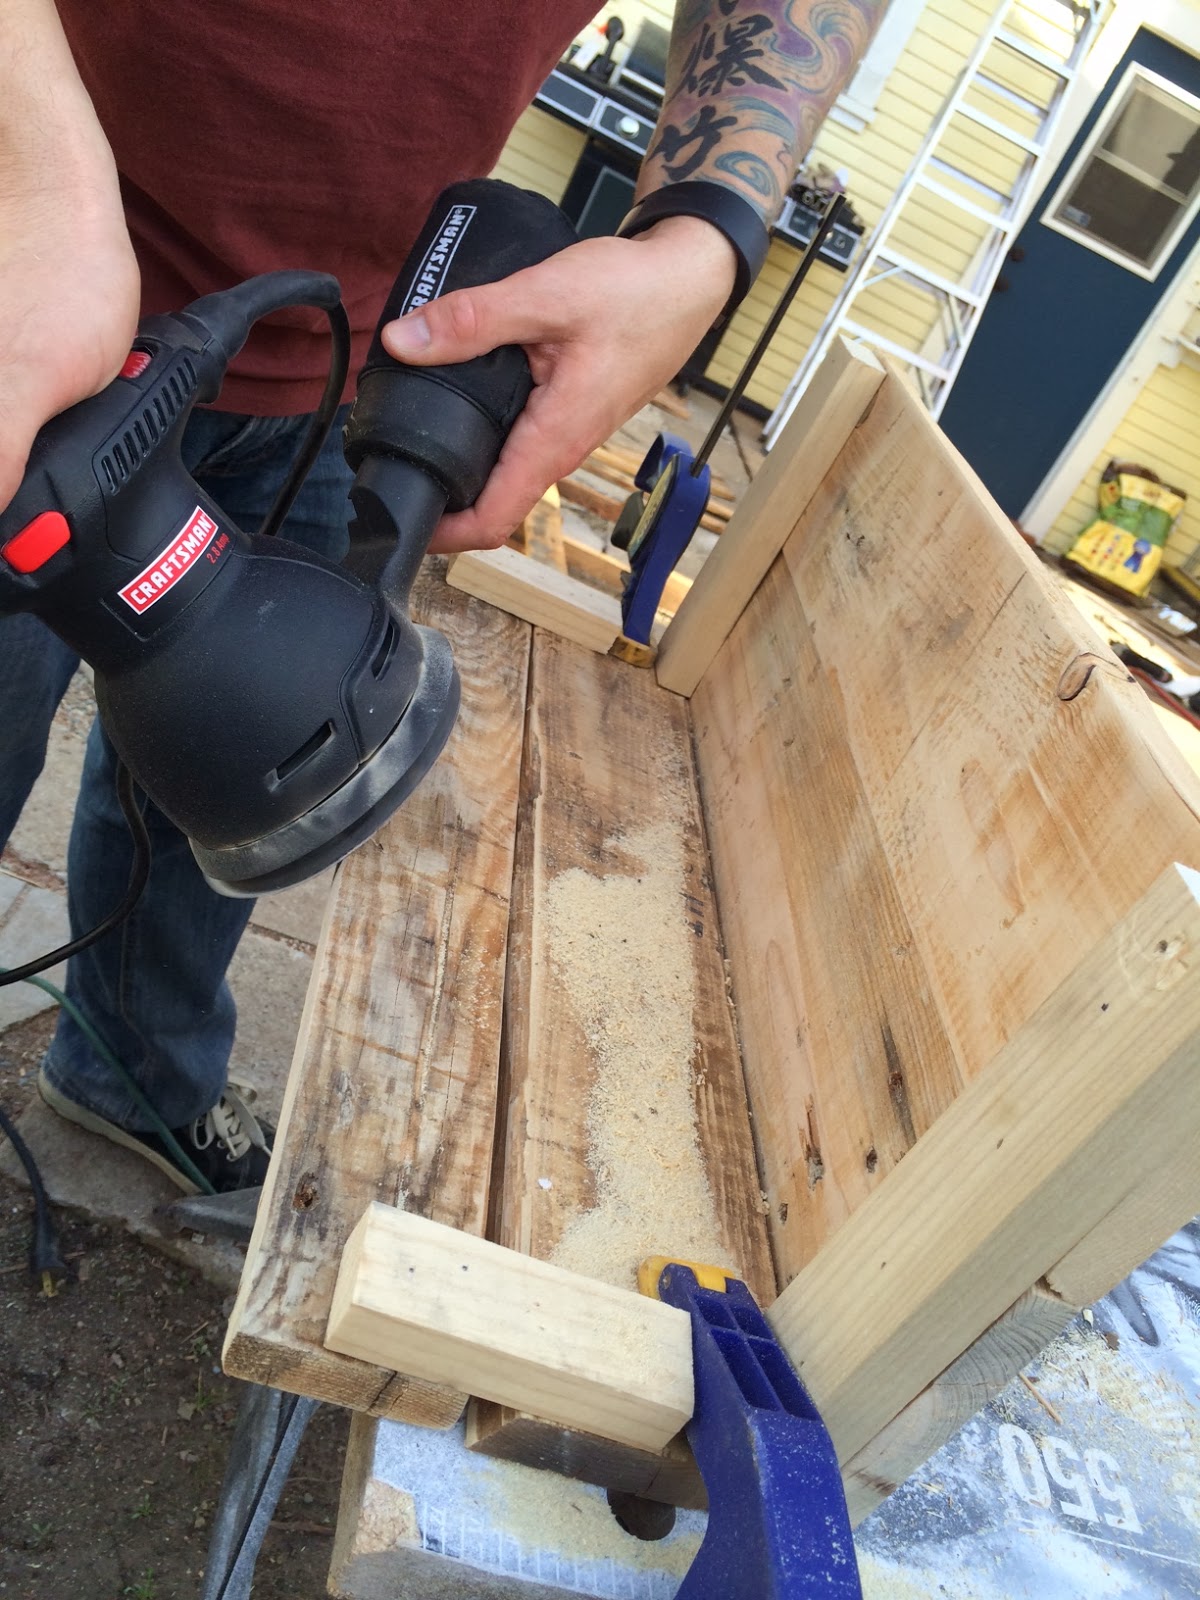
My shelf is only 8 inches deep, so I had to trim the bottom board to allow for a finished length of 7.5 inches. After attaching the back board with my nail gun, I measured both sides and cut two more boards to length, then nailed those on.
After a coat of wood conditioner and a lot of beeswax, my box was done!
I did also add felt footies though, so the box doesn't scratch my freshly painted shelves.
And here it is, filled with DVDs on my new shelves. I love that it just looks like an inconspicuous crate - you'd never guess it's hiding my very embarrassing movie collection!
Now I can't wait to make a bunch more just like it!
Showing posts with label diy. Show all posts
Tuesday, December 17, 2013
Wednesday, September 25, 2013
Vintage Chair Yeti-Over
Long-time readers may remember this vintage chair make over from way back in 2010. Sadly, when I moved into my house, the chair sat in the workshop for a while and someone left something metal on the seat, where it promptly rusted and left a big stain on the cream chenille. I tried cleaning it and only made it worse. It was a sad, sad day at the Rosenfeld Cottage.
Until! I saw this awesome chair on Apartment Therapy.
Not surprisingly, it's super difficult to find a gorgeous skin like that for an affordable price. But West Elm sells these Mongolian lamb's wool pillow covers for slightly less than a fortune (and I had a gift certificate that covered a big chunk of the cost).
And here is the after...
Maybe not quite as luxurious as the original inspiration, but it's definitely fun and adds a lot of texture to the living room. What do you think?
Until! I saw this awesome chair on Apartment Therapy.
Not surprisingly, it's super difficult to find a gorgeous skin like that for an affordable price. But West Elm sells these Mongolian lamb's wool pillow covers for slightly less than a fortune (and I had a gift certificate that covered a big chunk of the cost).
I don't know how well these will hold up, so I didn't want to go through all the pain of actually reupholstering the chair - plus I didn't want to cut the pillows up. Who knows what would happen with all that fur? So I basically laid one pillow cover over the seat, and loosely basted it to the piping on the upholstery in the front and back. Then I looped the second cover over the back and did the same thing.
Here is the before (without the tragic seat stain)...
Maybe not quite as luxurious as the original inspiration, but it's definitely fun and adds a lot of texture to the living room. What do you think?
Sunday, September 22, 2013
DIY: First Day of Fall Wreath!
Fall is officially here! I've been waiting for scarf and boots weather for MONTHS, and even though it's still 80 degrees outside, it has not deterred me one bit. In order to ring in the fall properly, I decided to make a new wreath for the front door, inspired by this one at Paper Source. But instead of paying $20, you can pretty much make this from scraps you make have lying around the house.
Here's what you need:
1. Cardboard for creating the wreath ring and the leaf template
2. Fabric and/or paper scraps (I used a mix of fabric, paper, pleather and felt)
3. Hot glue gun and glue sticks
4. Scissors
5. A pen
Optional Supplies:
1. Iron and starch
2. Feathers
3. Stalks of dried wheat
I started by tracing a dinner plate onto the cardboard, and then a dessert plate inside that circle. I then cut around the outer line and the inner line to give me my wreath form. Then I freehand drew the leaf template and cut that out too.
Then came the tedious part. I traced the leaf onto all the fabric and paper, and cut out millions of little leaves. Okay, it was more like 100, but it felt like millions.
It's not important to have an even number of colors, I wound up using about 12-16 of each (I had 7 different fabrics). You can always cut more if you run out! My fabric was a little wrinkled, so I starched and ironed the leaves, folded them in half longways, and then pressed them again. The crease makes them stand up a bit, and gives the wreath a little more body.
Next, hot glue your leaves, round-side down, to the outer most part of your wreath form, overlapping the sides just a bit. I tried to use every color equally, without it being too perfect or deliberate. As I went around, I incorporated the feathers and wheat stalks.
You should end up with three rows of leaves on the cardboard ring. For the fourth and final row, glue the leaf onto the ring about halfway up the piece of fabric (instead of on the round bottom), and then fold the round part around to the back of the form and secure it with more glue. This way you'll hide the rough edge of the cardboard.
When you're all done with that, secure a loop of ribbon or string to the back of your wreath for hanging. Because my wreath is going to end up on a glass door, I finished the back by gluing a ring of the pleather.
I also added a bow to the front, to polish things off. And there you go! A super snazzy new fall wreath! Paper Source, eat your heart out!
Labels:
craft,
craft paper,
diy,
fall,
Paper Source,
wreath
Monday, August 19, 2013
DIY: Back to School Book Covers!
Confession: I am not actually going back to school. But I do miss shopping for school supplies - the smell of new binders, a fresh ream of college ruled paper, testing all the different pens to find the ones with the smoothest action... ah the memories. And perhaps this was a harbinger of my later love of paper crafts, but I always enjoyed making paper book covers out of brown paper shopping bags.
It occurred to me the other day that just because I don't have any textbooks lying around, doesn't mean I can't dress up all my old paper backs with a little splash of color! So I hightailed it over to Michaels, carefully selected seven coordinated sheets of scrapbooking paper (59 cents each), and set out on the easiest project ever.
In case you don't remember how to do this, it's pretty simple. Here are the materials you need:
- decorative paper
- pen (I am using a metallic gold artist's pen, but you can use whatever you like)
- scissors
- a book
And here is what you do:
- Trim the paper to remove any barcodes or other elements you don't want on there
- Center the book in the middle of the paper (paper should be pretty-side down)
- Make creases in the paper that align with the bottom of the book and the top of the book, so you're basically folding the paper lengthwise into three sections
- Wrap the paper around the book, folding under the excess paper on the ends
- Tuck the covers into those newly created flaps
- Write the name and author of the book on the spine, so you know which one it is
And this is what it should look like when you're done!
Now my little book collection is super adorable! Much better than the dog-chewed paper backs that I was too embarrassed to display before!
Now I can't wait to make over all my old books!
PS Aren't my bookends adorable? I got them at Home Goods!
Saturday, May 18, 2013
DIY Pallet Succulent Garden
Anyone with a Pinterest account can tell you that pallet creations are all the rage. People are making all kinds of things out of them - coffee tables, headboards, lounge chairs, wine racks, book shelves, porch swings... the list goes on and on. But perhaps the most enduring pallet craft is the succulent garden.
But as common as this project is, I couldn't find a very informative tutorial on just how to make one! So I figured the best way to learn to make one of these is just to go ahead and do it.
Here are the materials you need:
- A pallet - try to find one in relatively good condition - the boards should be anchored strongly, not too much splintering
- Lanscape fabric - this is pretty cheap, you can pick up a big roll of it at a home improvement store for about $10 (and you'll have a ton left over - better to find a friend with some spare landscape fabric lying around)
- Planting soil
- An appealing array of succulents
- A staple gun
If you're planning to hang your planter on a wall, like I did, you'll also need:
- A good drill (with a masonry bit, if you put it on cinderblocks like I did)
- Long screws (again, masonry screws were called for here)
- A board that is sized to the width and depth of the pallet (and /or a saw to cut the board to size)
- Wood screws
Cut the landscape fabric to size, slightly bigger than the back of the pallet. Use your staple gun to securely staple the fabric to the back, folding in your edges so it's a little tidier and sturdier when stapling. Don't be stingy with the staples - there will be some weight on this, and you want a pretty complete line of staples to prevent dirt from seeping out.
Leave the top of the planter open (i.e., not wrapped in fabric), but bring the fabric over the bottom opening and secure it with more staples. Then attach the board to the bottom with the wood screws (necessary if hanging the planter, but not if you're planning on letting it sit on a solid surface).
Rest the pallet on the fabric side, and fill with planting soil, making sure it's pretty well packed behind the boards. Plant your succulents in the openings, and pack the soil tightly around them. I found it's better to use a succulent with a smaller base and a fuller top, so less dirt will fall out when you turn it vertical. Don't plant the top yet!
Once you're done, turn the planter (slowly) on it's side, and mount it to the wall with the appropriate screws. If you're feeling fancy, a french cleat would really do the trick here. I did not use a french cleat.
Once your pallet is firmly secured to the wall, plant the top opening, and there you have it!
Also, a quick watering tip: use a hose, set to "shower" or "mist". It's really hard to get a watering can into the different planter beds. I sort of wish I had the whole thing on a piano hinge, so I could lift it horizontally to water it!
Saturday, April 27, 2013
Where Once Was a Window
One of my favorite parts of the new deck is this area right outside my bedroom door. Once upon a time it was just the top of the driveway, used to store trashcans and other assorted demo debris. But now it's a private little nook, just waiting to be given a purpose.
When I asked my brother, Monty, to build me a gate on the other side of my bedroom window, I was really just setting him up for the eventual request to replace that window with a door. And being the awesome guy that he is, this weekend he kindly obliged.
First, the old window had to go.
Then the scary part - cutting out the wall!
In a crazy stroke of luck, the window was almost exactly the right width and height for the door replacement. Only very minor adjustments had to be made.
Oh boy, that pic probably should have been censored...
And voila! Door is in! A little trim work, patch, plaster, and paint, and I officially have a walk out from my bedroom! And just check out the exterior...
Too freaking cute! And here is the overall view, all dressed up for a Sunday BBQ...
The rest of the backyard is still a disaster, but I love that I now have one (small) outdoor space that is officially finished. It makes me so motivated to get the rest done!!
Saturday, March 16, 2013
Awfully Big Deck You Got There
When my parents and I walked through my house, before I bought it, the first thing my mom said was "I would rip down this patio cover and open this all up." At the time I thought she was crazy. First of all, SHADE! Secondly, it's a covered outdoor space, who doesn't love that?
Two and a half years later, I am willing to admit my mom was right (didya hear that Mom??). The roof had gotten progressively leakier over the years, not to mention sustained quite a bit of termite damage. And the cement floor was severely sloped (toward the house), so if I ever wanted to level it out, it would mean the roof would be incredibly low on one side. I finally decided to give up putting lipstick on the pig, and just take it all down.
Here is the before...
I'm not going to lie, this was way more work that I expected. The roof was tarred right up to the siding of the house, so taking that down meant damaging quite a bit of the siding. And then about a third of the cement floor had to be chipped up and thrown into a dumpster (such back-breaking work), just so we could make a level frame for the deck.
Once that groundwork was laid, the actual decking went in pretty quickly, thanks to this handy tool.
Not only does it help people who are not that great at drilling screws in straight (ahem), but it also puts the screws into the sides of the board, so they're hidden. And check out the results!
Pretty fancy, eh? It's amazing how much brighter the space is - it feels like a whole new backyard!
Friday, February 1, 2013
DIY West Elm style pouf
I love these dhurrie poufs, at West Elm. I dunno why exactly, it's like all the fun of a bean bag, but with the sophistication of an ottoman. I mean, how cute is this?
But I don't love the $249 price tag. For that price, I could get a real piece of furniture!
So one day I was eyeballing my old memory foam mattress topper and wondering what the heck I should do with it, when it hit me - I should make a pouf!
I used my electric bread knife to cut the foam into 24 inch squares, and then layered them all on top of each other, like a layer cake (using spray adhesive where the frosting would go). I had to clean up the edges a little bit, as (much like my layer cakes) my 7 layers were a little lopsided.
Then wrapped the whole thing in a layer of batting, and used an old mattress cover to make a little pillow case for the stack of foam. This will keep it nice and tidy inside the final slip cover, and disguise any unevenness in the edges of the foam.
Finally I used a dhurrie rug that I got on sale from Urban Outfitters (only $89!) as my material. It frays like a maniac, but the texture is consistent with the West Elm pouf. And unlike those other poufs, I outfitted mine with two zippers on the bottom, so that I could easily remove the cover for washing.
All in all, it only took about three and a half hours. And look how cute!
My only regret is that I had but one mattress topper to give to this craft project.
But I don't love the $249 price tag. For that price, I could get a real piece of furniture!
So one day I was eyeballing my old memory foam mattress topper and wondering what the heck I should do with it, when it hit me - I should make a pouf!
I used my electric bread knife to cut the foam into 24 inch squares, and then layered them all on top of each other, like a layer cake (using spray adhesive where the frosting would go). I had to clean up the edges a little bit, as (much like my layer cakes) my 7 layers were a little lopsided.
Then wrapped the whole thing in a layer of batting, and used an old mattress cover to make a little pillow case for the stack of foam. This will keep it nice and tidy inside the final slip cover, and disguise any unevenness in the edges of the foam.
Finally I used a dhurrie rug that I got on sale from Urban Outfitters (only $89!) as my material. It frays like a maniac, but the texture is consistent with the West Elm pouf. And unlike those other poufs, I outfitted mine with two zippers on the bottom, so that I could easily remove the cover for washing.
All in all, it only took about three and a half hours. And look how cute!
My only regret is that I had but one mattress topper to give to this craft project.
Labels:
diy,
foam,
mattress topper,
pouf,
upholstery,
West Elm
Tuesday, March 6, 2012
A Very Chair-y Seating Situation
It wasn't very long ago that I was on a desperate search for dining room chairs. The two that I pulled out of the dumpster didn't quite cut it in my new, larger, dining room. And buying them new is expensive! So I did what I do, and went to the flea market.
There, I found a set of four chairs in reasonably decent shape, just needing new seats - piece of cake! That same weekend, my mom showed up with two more chairs, of a similar style but with higher backs, also needing new seats. Presto, I have a set of six dining chairs!
A few weeks later, I wound up the lucky recipient of four more dining chairs that had previously been owned by my grandmother, and were not only in perfect condition, but were also delightfully Mid-Century Modern. Now I have ten dining room chairs in two very different styles. I think this is what they mean when they say "an embarrassment of riches."
But while I had a plethora of indoor seating, I was sorely lacking in outdoor seating. That is, until I had the idea to combine three of the chairs into a bench for my back porch! Here's what I did...
First, of course, I removed the existing seats, gave the chairs a rough sanding, and cut down the legs on the middle chair a bit, to make the heights all even.
I'm going for a shiny metallic finish, and I read somewhere that a coat of black paint underneath the metallic will help it shine. They don't really make black spray paint primer though, so I just used regular black spray paint. We'll see if it works!
Then I had Garrett help me cut a piece of plywood to the right shape to stretch across all three chairs, including the little notched out piece in the back of the middle chair.
Looking like a bench already! There are some reinforcements under the seats that you can't see - the plywood wasn't a sturdy enough base to keep the chairs from wobbling around when you lifted the whole thing up. We cut wood blocks and used them to attach the bottoms of the chairs together with long wood screws.
Once the seat was cut, it was time for the fun part - upholstery! I bought the fabric on etsy, and ironed on this vinyl coating, to make it waterproof. I didn't want to simply use outdoor fabric as I knew it would get dirty really quickly, living outside. And I didn't want the foam to get wet and deteriorate. With this iron on stuff, you can just hose off the seat when it gets dirty! The only bummer is that the vinyl only comes in 18" widths, so you have to cut two pieces and overlap them a bit. It's not hard, just a little time consuming.
I used three inch high density foam (also from amazon, which was way cheaper than Joanns), spray adhesive, and my trusty staple gun to attach it all to the plywood backing.
I attached the seat to the newly assembled bench through the original seat screw holes, and voila! A totally cute outdoor bench that seats three!
Now all I need is a cute outdoor space to put these in.
Sunday, July 24, 2011
Kitchen Update: Finally Finished!
The day has come! It's over! The kitchen is finished! Exclamation points for all!!
It was quite the push to the finish, especially since I stupidly invited some people over for a reveal a little later this afternoon (way to give myself a deadline! why didn't I just do it next weekend??). But in reality, it's nice to have something to aim for. If you I don't have a real motivation to wrap things up, projects tend to stretch into the "I'll get around to finishing that eventually" category.
Alright, enough of my jibber-jabber! You want to see the finished product, don't you?! Let's do a before and after!

The craziest part is how clean everything looks, haha! That was no easy feat. But just check out the new sightline through to the rest of the house...
Three weeks ago, that picture would have been of a wall! It's truly an amazing transformation. Now that it's done, I sort of want to do it all over again!
It was quite the push to the finish, especially since I stupidly invited some people over for a reveal a little later this afternoon (way to give myself a deadline! why didn't I just do it next weekend??). But in reality, it's nice to have something to aim for. If you I don't have a real motivation to wrap things up, projects tend to stretch into the "I'll get around to finishing that eventually" category.
Alright, enough of my jibber-jabber! You want to see the finished product, don't you?! Let's do a before and after!

The craziest part is how clean everything looks, haha! That was no easy feat. But just check out the new sightline through to the rest of the house...
Monday, May 24, 2010
End Table Before & After
If you read this blog, you should know by now that I am no stranger to flea markets and a borderline hoarder when it comes to ratty furniture with big possibilities. Years ago, I picked up this little end table at the Melrose Flea Market, and always intended to re-finish it.

You can see how beat up the finish is, and it's hard to tell, but the side was also pretty badly gauged. But underneath that, the parquetry just begged to be brought back to life. This weekend, I kindly obliged.

With the amount of puttying I had to do on the damaged side, I wasn't able to stain the entire thing. Instead I painted both sides and hind legs black, and then did the same to the ornate front feet (just because I'm lazy and didn't want to sand all those curves and crannies). But I think the two-toned effect really works with all the different hues in the wood.
What a dramatic difference, eh?

You can see how beat up the finish is, and it's hard to tell, but the side was also pretty badly gauged. But underneath that, the parquetry just begged to be brought back to life. This weekend, I kindly obliged.

With the amount of puttying I had to do on the damaged side, I wasn't able to stain the entire thing. Instead I painted both sides and hind legs black, and then did the same to the ornate front feet (just because I'm lazy and didn't want to sand all those curves and crannies). But I think the two-toned effect really works with all the different hues in the wood.
What a dramatic difference, eh?
Monday, October 12, 2009
Befores
I've had some good luck junking in the last few weeks! Check out these two little diamonds in the rough that people had left out for the garbage collector:


And this little beauty was only $15 at a local flea market:

As my place gets more and more packed with "projects" I am beginning to feel a little bit like one of TLC's Hoarders. So I might have to put these items up for sale in the shop once they're done. Keep an eye out for the "Afters" post!
And this little beauty was only $15 at a local flea market:
As my place gets more and more packed with "projects" I am beginning to feel a little bit like one of TLC's Hoarders. So I might have to put these items up for sale in the shop once they're done. Keep an eye out for the "Afters" post!
Labels:
before and after,
diy,
flea market,
furniture makeover,
hoarders,
junking
Easy Candles
Is anyone else sick of using tea lights for ambiance? They burn out so darn quickly! How about a really simple, reusable, and decorative alternative?
For this project, all you need are some jars (I used spice jars from Ikea, only $2.99 for a 4 pack), melting wax (soy wax is said to burn cleaner than paraffin wax), wicks (try to get them without the wire), and a little tacky glue.

The instructions on the wax said to use some special kind of tacky wax to stick the metal plate of the wick in the jar. I didn't have any, so I used tacky glue, and it seems to work out pretty well. Just make sure the glue is dry before you pour in the hot wax.
You can melt the wax 30 seconds at a time in the microwave, but doing this tripped the 1939 electrical circuit in my duplex, so I had to resort to the old-fashioned method - melting on the stove top. Don't put the wax directly in your saucepan, use a double broiler method instead.

When the wax is clear, without any chunks, pour it carefully into your jar, avoiding the wick. It will turn opaque as it cools.

When you're done, you'll have a tidy little set of spice jar candles, which you can keep refilling with new wicks and wax as needed.

I am thinking of tying wire around the top lip of the jars, and using them as hanging candles outside.
For this project, all you need are some jars (I used spice jars from Ikea, only $2.99 for a 4 pack), melting wax (soy wax is said to burn cleaner than paraffin wax), wicks (try to get them without the wire), and a little tacky glue.
The instructions on the wax said to use some special kind of tacky wax to stick the metal plate of the wick in the jar. I didn't have any, so I used tacky glue, and it seems to work out pretty well. Just make sure the glue is dry before you pour in the hot wax.
You can melt the wax 30 seconds at a time in the microwave, but doing this tripped the 1939 electrical circuit in my duplex, so I had to resort to the old-fashioned method - melting on the stove top. Don't put the wax directly in your saucepan, use a double broiler method instead.
When the wax is clear, without any chunks, pour it carefully into your jar, avoiding the wick. It will turn opaque as it cools.
When you're done, you'll have a tidy little set of spice jar candles, which you can keep refilling with new wicks and wax as needed.
I am thinking of tying wire around the top lip of the jars, and using them as hanging candles outside.
Subscribe to:
Posts (Atom)